Saturday, October 1, 2016

My Latest Erin Condren Delivery

It's not a surprise that I love Erin Condron. It's always exciting when I get a delivery. In this delivery I got the latest 2016 2017 life planner, accessories, I took advantage of a BOGO sale and got some new interchangeable covers.

I enjoy seeing little messages click "hello friend" and when I opened it up there is a 20% off my next purchase, so thank you Erin Condren!
New this year was the keep it together pouch was loose so that you could choose where you wanted to place it in your planner.

A couple of accessories that I had had my ion for a couple of months for the new race markers and travel planner ask for it. My husband travels a lot for work, and there are times when I am like enough to get to join him and it can be short notice so it's nice to have a planner bitch to make sure I have everything I need.
When I decided to finally place my order, luckily there was a sale! They were doing their buy one get one free interchangeable covers so I had to order several! I absolutely love this Halloween cover. I decided to personalize it with beginning lyrics from my favorite song from Wicked, the musical. (And just a reminder that the title of my blog is inspired by the musical Wicked.)
I also ordered a chevron cover for my teacher planner. My entire classroom has chevron on each bulletin board, my throw pillows, and other parts of my classroom so I thought why not my planner.
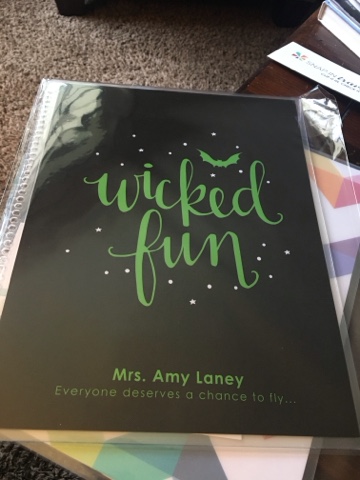
Lastly I chose the new Halloween cover "wicked fun" for my teacher planner because that's kind of how I feel about teaching.
Just a few of my teacher planner interchangeable covers.


Saturday, August 20, 2016

Back to School! Displays, Organizations, & Quick Tips (this is my 3rd Blogaversary!!!)


Before the classroom can be picture perfect and ready for the students, so much work has to go into setting up the classroom. Here are a few things from my classroom that I wanted to share.
1st you have to put the room together after summer cleaning and everything is shoved to one side of the room.

 It offers a great time to purge and clean out things you did not use from the previous school year.
Tip 1- Library Organization
I have all of my books in these bins separated my genre or author. I also have color-coded all of the books to show their level.
Tip 2 - Make Lists
Best tip a teacher ever shared with me for setting up a classroom is to make a list on the board so that you mark off as you go...even the little things.
Not really a tip but just a quick show the schedule board after using it for a couple of months. Since I had a chalkboard, I used chalk-paint for semi-permanent messages. It wiped off with water but not when just erasing with a normal eraser.
Tip 3 - Create bulletin boards where ever you need them.
This wall needed to be painted badly and had wires sticking out, so I made it stapled fabric to wall and created a year-round bulletin board. Since I had to use a staple gun to put the bulletin board up, I chose to put up a Growth Mindset board so that when at the front of the room, I could just point and positive approaches for the students to try instead of giving up. What the students didn't know was the eye-sore that was behind there.
Tip 4 - Double Border on the bulletin boards. I have spent a lot of money over the years at my favorite "Teacher Store" buying border. I realized that my bulletin boards looked disconnected with different trim on each board so now I customize each board for what they cover but I use one common teal chevron border along with the themed border. It helps to have flow within the classroom. This may not be important to most people but when I spend so much time in a room, it bothered me to have so many themes from super hero behavior to reading owls.
Tip 5 - Organization Bins
I have used milk crates and bins to create shelves and storage for years. This is simply 2 milk crates held together with zip ties. Then I attached a letter basket to the top with zip ties. The letter bin holds lined paper, a box of tissues, and a storage bin. In  the bin, there are post-it notes, a box of markers and glue sticks. These supplies are located at each group. This eliminates excessive roaming and offers supplies when students need them quickly.
 Tip 6 - Student Supplies
On the first day of school, as we get the students organized with their materials, I have a basket of everything they should have plus a few extras for students who are missing materials. This gives me the ability to model and label all the materials that we will be using throughout the year.
Tip 7 - Teacher Corner
I believe that the classroom belongs to students but its nice that I have a little corner with my supplies. I have a cute mouse for my computer that is wireless, which helps when I roam around the room but still want to control what is displayed on the board. I also have all of my pens neatly organized for quick access. Lastly, I put up a small bulletin board for personal photos or drawings from the students.
Tip 8 - Poof balls are more than decoration
I use to get headaches while teaching and realized that it was the lighting. I happen to have had a couple of poof balls in a corner and noticed kids like to read in that corner more that anywhere else. So I moved the poof balls, added poof balls to coordinate with the color of the storage bins and reduced the harshness of the lights. I love 2 for 1 ideas.
Idea to share-
I believe in a positive classroom and believe all students should be heard. Some students are shy or don't want to share aloud. I had seen ideas like this on Pinterest and decided to try them myself. The students responded so well that a couple of students took over the messages that the students responded to each time.
Last display to share-
I created a classroom Instagram for parents and students to follow so I decided to created a classroom Instagram bulletin board. The plan to change out the pictures throughout the year. This is the board that everyone sees as soon as they walk into the classroom.

Saturday, July 2, 2016

Trader Joe's BBQ Sauce Showdown

Being from the south, BBQ is a staple. Growing up in Kentucky, I got used to certain style of smoked meats, usually pork, chicken, and uniquely mutton. The sauces were always on the side and usually a vinegar based. As an adult through traveling around the US and living in Colorado, I have been exposed to every other style out there from Kansas City Style to Memphis to North Carolina and Texas.

While shopping for the 4th of July Weekend, my husband and I came across Trader Joe's selection of BBQ sauces. We were planning on smoking some meats at my brother's house. Our job was to find sauces to try so we decided to try 4 different sauces from TJ's, as pictured below. (I think they might even have 1 or 2 more)


The first one is the closest to home style for me. Carolina Gold is sweet and mustardy that is used for dipping or as a glaze at the end of grilling. 


The next one up is, Brown Sugar BBQ Sauce. This one seems the closest to Kansas City Style sauce. This sauce is thicker with a sweet and mild heat to it. You can slather this on your meats and let it carmalize while grilling.


The third one we tried was the Kentucky Bourbam BBQ Sauce. It is similar to the previous one but darker in color and flavor due to molasses. This sauce also has a smokey, sweet flavor with a mild to medium heat. Ideally, this sauce is meant to used in basting and slathering meats while grilling. 


The last one that we tried is the Siracha and Roasted Garlic BBQ Sauce. This sauce is sweet, spicy, and garlicky. We have used this sauce numerous times, although I find it too spicy for myself. It has been a hit at cookouts and pizza parties over the past few years. We used this sauce with leftover chicken and made a killer BBQ pizza, but our friend has used it to make an awesome vegetarian version pizza. 


Originally, I thought I would post a favorites list of what we all thought but they were all so tasty in different ways that it was a 3 way tie. Ironically, the least favorite for this Kentucky based group was the  Kentucky Bourbon BBQ Sauce.


Thursday, June 30, 2016

Savings! An app that really pays off!!

There are so many apps out there that claim to save or earn you money. One of the ones I like is Shopkick, where you earn points by walking into store and scanning certain products, then you trade those points, or kicks, in for gift cards to places like Target or Starbucks. You can also get bonus points for referrals, well last July, I sent the link to a friend and she sent me a link to a different app for me to try out! That link was for IBOTTA! I love that app!!! 


The app follows the concept of how we use to use coupons, but now it's in a rebate form. You shop, you scan, then snap your receipt, an then after a few hours you get you refund! Once you have accumulated a certain amount, then you can cash it in for gift cards or sent it to a paypal account for cash! The rebates add up fast! In one year, I have earned $800+ from using IBOTTA! My results are not typical but I have sent referrals and taken advantage of bonuses during the holidays.
I am attaching a few screenshots of some of the rebates that I have unlocked so you can see what is available. I have everything from cereal to snacks, to even New Belgium beer!

The best way to utilize this app is to be open minded to try new things and spend a little time checking out what's rebates are available. It's equivalent to taking the time to skim through the Sunday paper to clip coupons. A big perk is referring to friends, your friends will get $10 bonus after their first rebate posts if they follow your link, but you get $5! 
Honestly, there were times where I let the rebate determine what I bought but not too often. IBOTTA introduced me to things I had tried before, like Chiboni Flips yogurt which is now a staple in my work fridge for breakfast. One rebate that became popular with my group of friends was a rebate of $4 for Bud Light and food. It was not our first choice of beverage but it made happy hour fn and cheap a few times!
As of tonight, after redeeming rebates on Luna bars and nail polish, I hit $802.30as my lifetime earnings! That is way more than I could earn clipping coupons!
You are welcome to follow this link to check it out for yourself and let me know what you think!


Wednesday, June 22, 2016

Road Trip Snacks: The bad, the good, & the tasty

Road trips are consuming my summer this year. Spending long hours in the car tend to make me want to snack here and there or plan snacks for when meal time is approaching. Through time, my husband I try to avoid restaurants that fall along interstates, so we usually pack a crate of food before we leave the house. I am going to share some of our favorites but would love to hear what my audience enjoys while they are on the road.
First I have share those snacks that I only eat while road tripping. These treats just seem to taste exceptionally good while in a car but I never eat at home...I am assuming I am not the only one who has snacks they feel that way about as well.
My favorite car only treat...
Chicharones (fried pork rhines)
Usually I go for whatever brand like this

But I recently found this bag at Whole Foods, which took a little guilt away 😉

Another snack I like is Beef Jerky. Usually this is something my husband buys but I always find myself trying a piece or two.

Lastly, I like to buy several bags of Goldfish Crackers and mix them all in one bag. I know these are kind of a common snack but they just don't taste as good to me at home as they do all mixed up while driving long distances.
When it comes to meals, we truly try to avoid fast food or just pure junk. Chips and sandwiches used to be our go to, but became boring quickly. We plan ahead for easy things to put in the cooler that can assembled easily road side and take a break. Luckily, we live in a beautiful state so sometimes we get a great view while lunching. 

This is an example of our recent road trip lunch.

My favorite little treat was a surprising combination. 
Triscuit, Laughing Cow Cheese, and blueberries...YUM!
What are your favorite road trip snacks? Healthy or not!

Tuesday, May 31, 2016

Erin Condren Teacher Planner Comparison of New to End of Year!

About this time last year, I posted how my 1st Erin Condren Teacher Planner was utilized by the end of the year. Today, I am pulling out my brand new one for next school year of 2016-2017 and comparing it to the very much used one of 2015-2016.
I decided to show my new planner versus my end of the year planner.
I ordered next year's planner a couple of months ago when they were having a sale, and then I saw this cover. It reminded my of Kid President type quotes.
That is probably the first change I made with my teacher planner was buying interchangeable covers. I caught them on BOGO sales.


The inside didn't change much but my students were constantly giving me notes at the end of the year, so there are several that are just shoved into the front cover of my planner.
I pack this page with all of my passwords, there seems to be so many in our teacher world.
Unforunately, we do not have a lot of volunteers at my school, so this page stayed blank the whole year. I hope to change that for the upcoming school year!
Calendar pages that I thought I would customize but didn't...
Traditional pages

Attendance is a big issue in our district.
 I tried to customize the pages with washi tape,
but never found a purpose for these pages
These pages came in handy for sketching out,
 but decided not to share to much.
Erin Condren did make a larger grid this year.
I ordered customizable labels and broke down our curriculum for the year.
LOVE the lesson planning pages. I printed our schedule on small Avery labels and used washi tape to block off our lunch and specials' rotation. My favorite addition I added this year was I found a tip on Pinterest to tape off the edges per quarter using different colors/prints of tape to see at a quick glance how much longer was left in a quarter. This tip really helped me while planning for testing and report cards.
A close up of the different colors/prints I used to separate the quarters.

Another addition I used this year was the personalized dividers. They are very cute but not necessary since the planner is already broken down in sections so well.
I used leftover pages from my previous year's planner to add into this year's planner.
Great resource for staying organized.
I love the idea of these stickers but there were some left over from my previous planner, so I have even more leftovers for this upcoming year.
I love the clear sleeves and pockets, I use them for everything from schedules to stickers.
I hate the idea of wasting the extra pages, so I tore them out and cleaned up the edges to use as clipboard checks or notes for this upcoming year.


ATTENTION-
save $10 more by clicking this link if it's your first order.

Your Referral Link :